5 minutes
Hacking: Modbus TCP simulation in Linux
ICS systems use many different protocols to communicate than standard IT systems. The most used standard is the Modbus protocol. Developed for the first time by Modicon (now Schneider Electric) in 1979 as a serial protocol, it has been modified and updated to work on an Ethernet TCP network, assuming the name of Modbus TCP. Below you can see a diagram summarizing the RTU (serial) packet structure and the TCP one.

If you want to learn more about the topic, I suggest you read the guide I wrote “Hacking: Modbus”.
In this tutorial we will simulate a Modbus master and slave configuration to illustrate how this now almost ubiquitous protocol in OT systems works in an industrial environment. The aim is to better understand how the protocol works and how it can be hacked, manipulated and protected.
Installation
Modbus uses a master/slave (client/server) architecture where only one device can send requests. The slaves/servers provide the requested data to the master or perform the action requested by the master itself. A slave is any peripheral device (transducer, valve, network unit, etc.) that processes information and sends its output to the master via the Modbus protocol.
In our case we will use two simulation software available for free, one with master functionality called QModMaster and the other in slave version, called ModbusPal.
QModMaster is an open source application based on the Qt framework which implements the functions of a Modbus master. It is equipped with a GUI that allows easy configuration of the communication modes (RTU, TCP) and with a bus monitor to analyze the traffic of the communication packets. If you use Windows, the pre-compiled binary version is available. In our case, we will download the source code and compile it on a Linux machine.
ModbusPal is an application written in Java, therefore it does not need any compilation as it is independent from the execution host. Simulate a Modbus slave device, with some advanced features like Python scripts.
As mentioned, we need to compile QModBus so that it can run on Linux systems, in my case Kubuntu 19.10. Download the source file qModMaster-code-0.5.2-3.zip and save it in a working directory, in my case ~/Develop/Projects/Modbus/qModMaster-code-0.5.2-3.
If we list the files present in the folder we see that the qModMaster.pro file is present, typical of a project developed with Qt. To compile it is necessary to have a minimum version of Qt 5.2.1 or higher, which can be downloaded from this link.
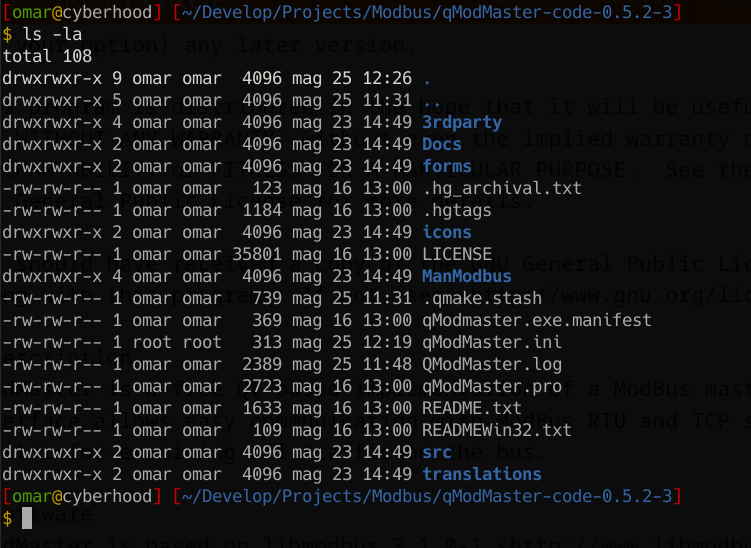
At this point we can use the qmake command to convert the .pro file into a Makefile, which can be compiled with the more classic make.
$ qmake -o Makefile qModMaster.pro
$make
After a few seconds of processing we have our executable ready!
Using the simulator
First we have to configure the slave, so that it makes its resources available to be read by the master, in this case we configure the “Holding Registers”.
{% hint style=“info” %}
Both applications require sudo privileges to access port 502/TCP, so you need to start them with sudo ./ModbusPal and sudo ./qModMaster in their respective working directories.
{% endhint %}
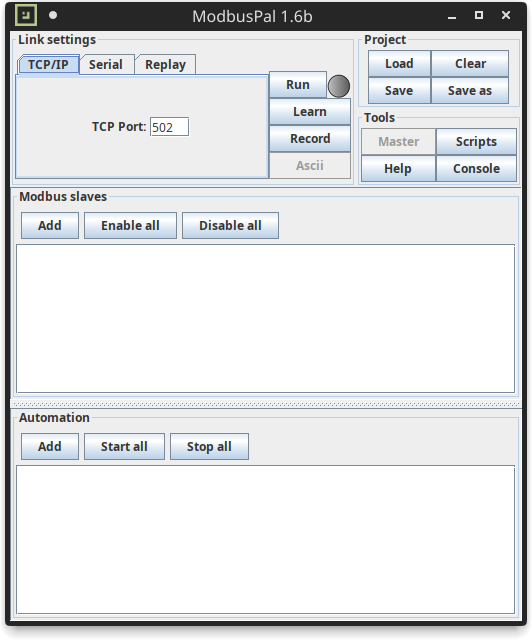
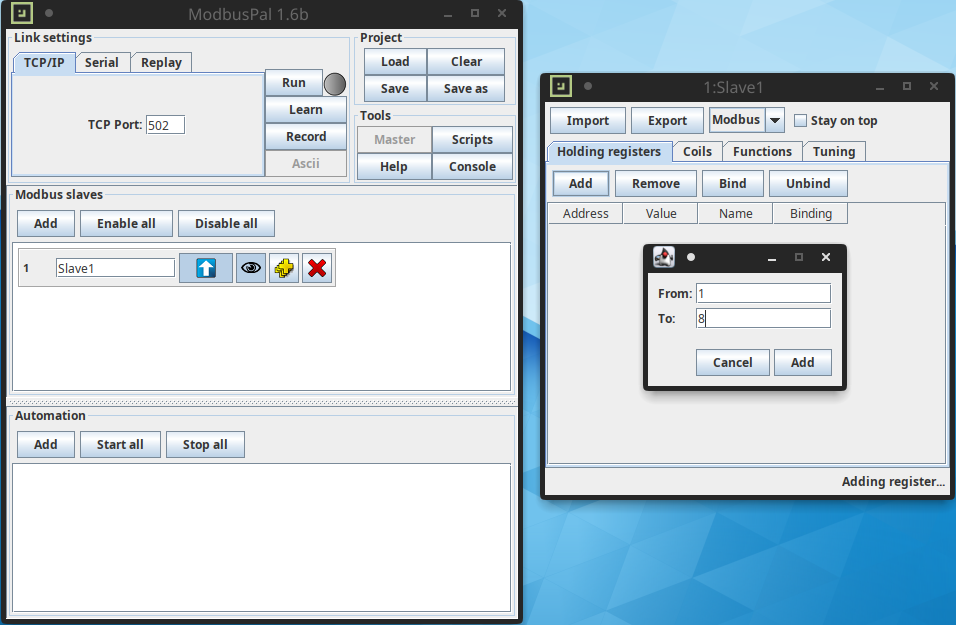
ModbusPal Slave Module Configuration
Link settings
****Select “TCP Port 502”.
The Modbus TCP protocol uses port 502 for TCP communication by default
Modbus slaves
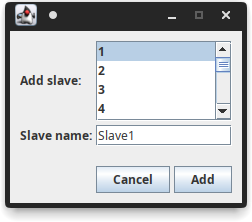
****We add a slave node by pressing the “Add” button, select the slave number and enter a name, in our case “Slave1”.
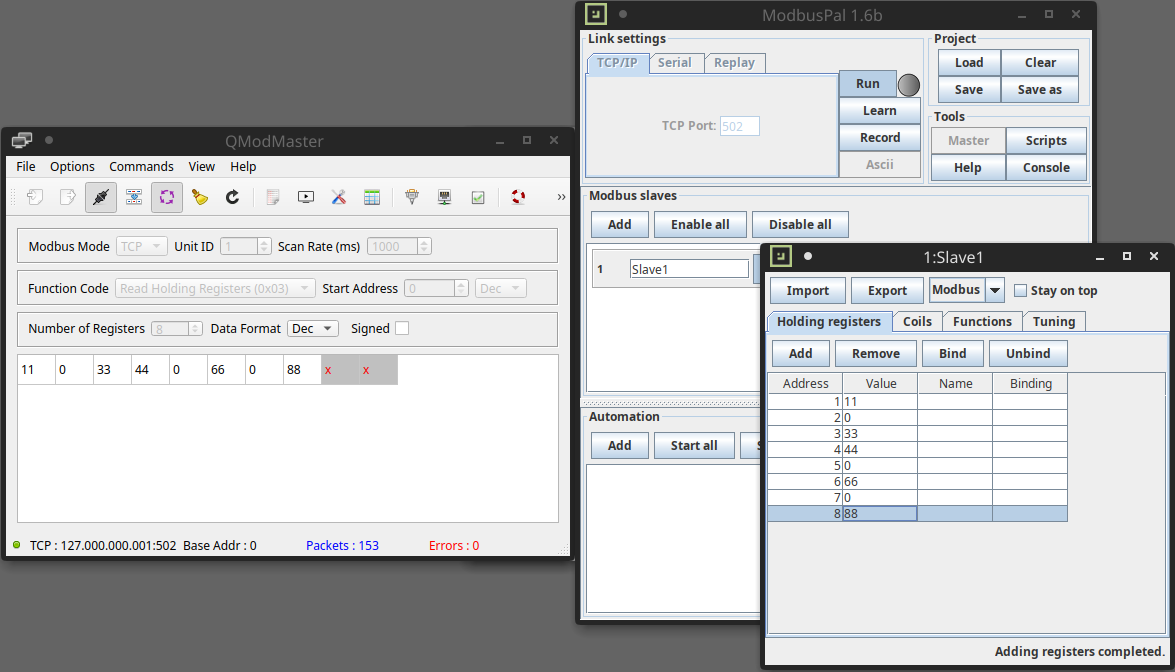
At this point we have to configure the parameters that we make available in our slave. Click on the eye icon to open the properties screen. Subsequently, click on “Add” and enter the number of registers we want to add, in our case from 1 to 8.
And here is the list of holding registers that we have created, with default values of 0. We can already modify their value at will, or do it when the master is also active to see their reading updated in real time.
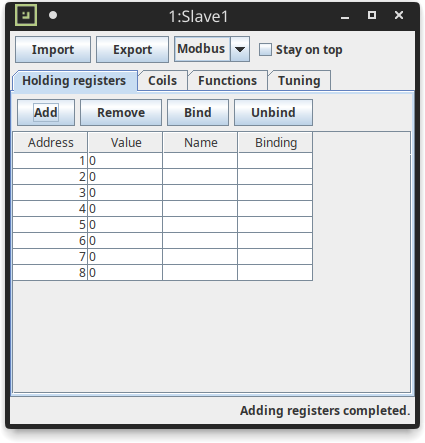
We are ready to start the slave, press the “Run” button on the main screen and go on to configure the master.
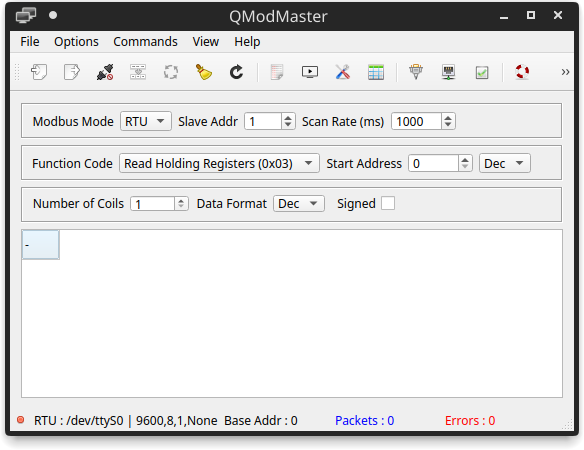
QModMaster master module configuration
The configuration of the master module is equally simple, it is necessary to keep in mind some parameters consistent with the slave that we have created:
Mobbus Mode: TCP
Unit ID: 1 (corresponds to the number of the slave we declared earlier)
Function Code: Read Holding Registers (0x03)
Number of Registers: 8
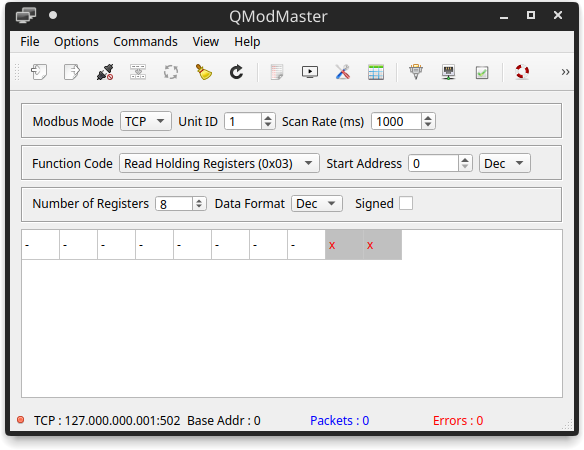
The “Function Code” and “Mumber of Registers” correspond to the type and amount of data that we declared in the slave module.
By default the master app is configured to communicate with IP address 127.0.0.1 and port 502 (as well as the slave). We can change these values by selecting the screen from the “Options” menu and then “Modbus TCP”.
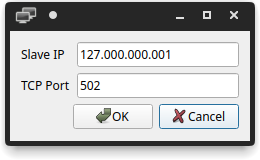
At this point we just have to activate the connection and the continuous updating of the data using the “Connect” and “Scan” buttons. The continuous updating time of the data is determined by the “Scan Rate (ms)” parameter, which in our case corresponds to an interval of 1 second.
Data update
And here is that if we go to modify the data of the registers of our slave we will have the corresponding update on the master.
Let’s try to write with the master
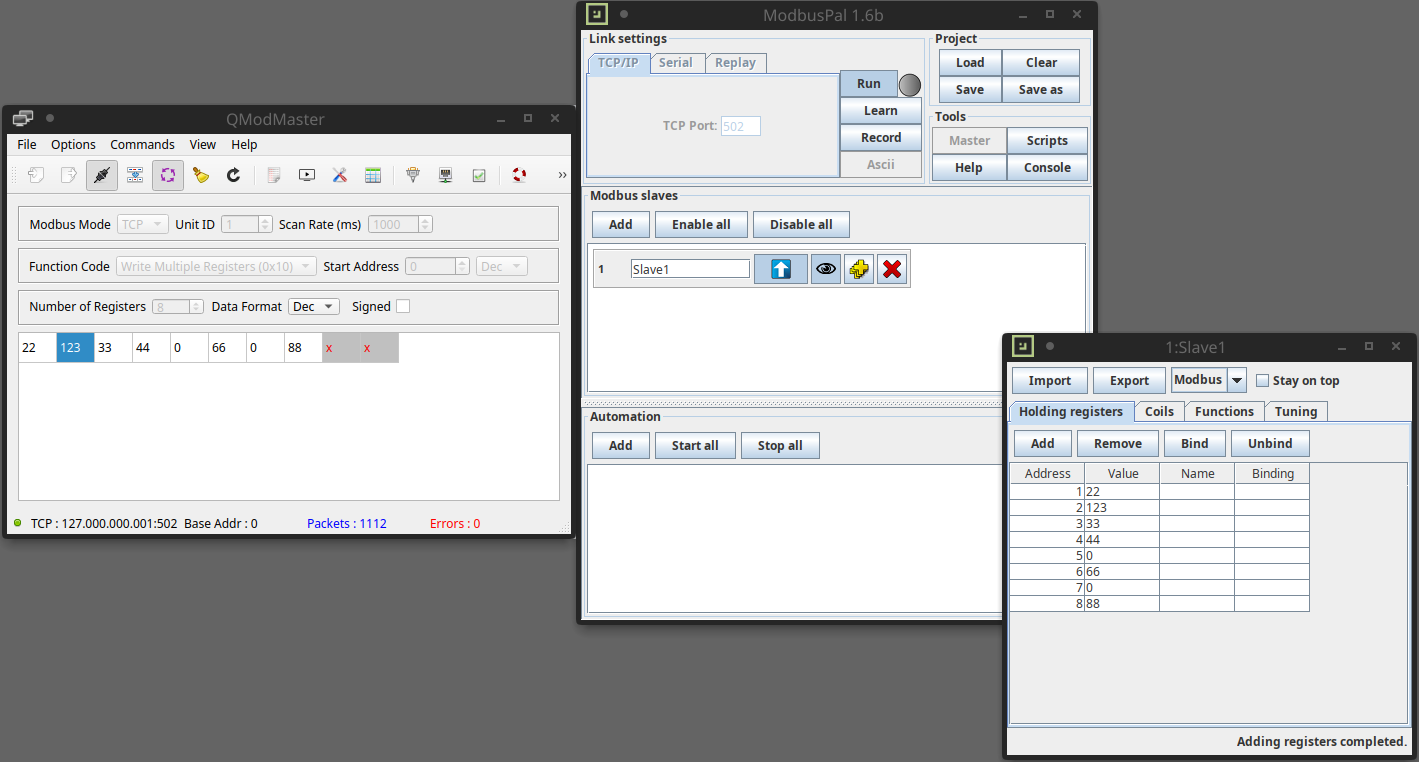
Now that we have seen how it is possible to read data from the slave let’s try to modify the values of the registers from the master. We interrupt the continuous scan and choose “Write Multiple Registers” in the “Function Code” parameter of the QModMaster main screen.
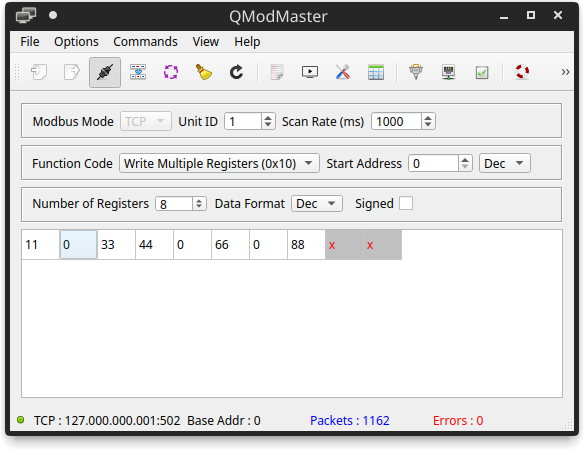
Let’s reactivate the continuous scan, now we can double click on each field of the register to modify its value, which we will see updated on the slave module.
Important note
This article is intended for educational and informational purposes only. Any unauthorized action towards any control system present on a public or private network is illegal! The information contained in this and other articles are intended to make people understand how necessary it is to improve defense systems, and not to provide tools for attacking them. Violating a computer system is punishable by law and can cause serious damage to property and people, especially when it comes to ICS. All the tests that are illustrated in the tutorials have been carried out in isolated, safe, or manufacturer-authorized laboratories.
Stay safe, stay free.